
This week we are going to learn a nice effect like this one using Adobe Photoshop.
(Extra: have you found the hidden games in FLASH 8 click here).
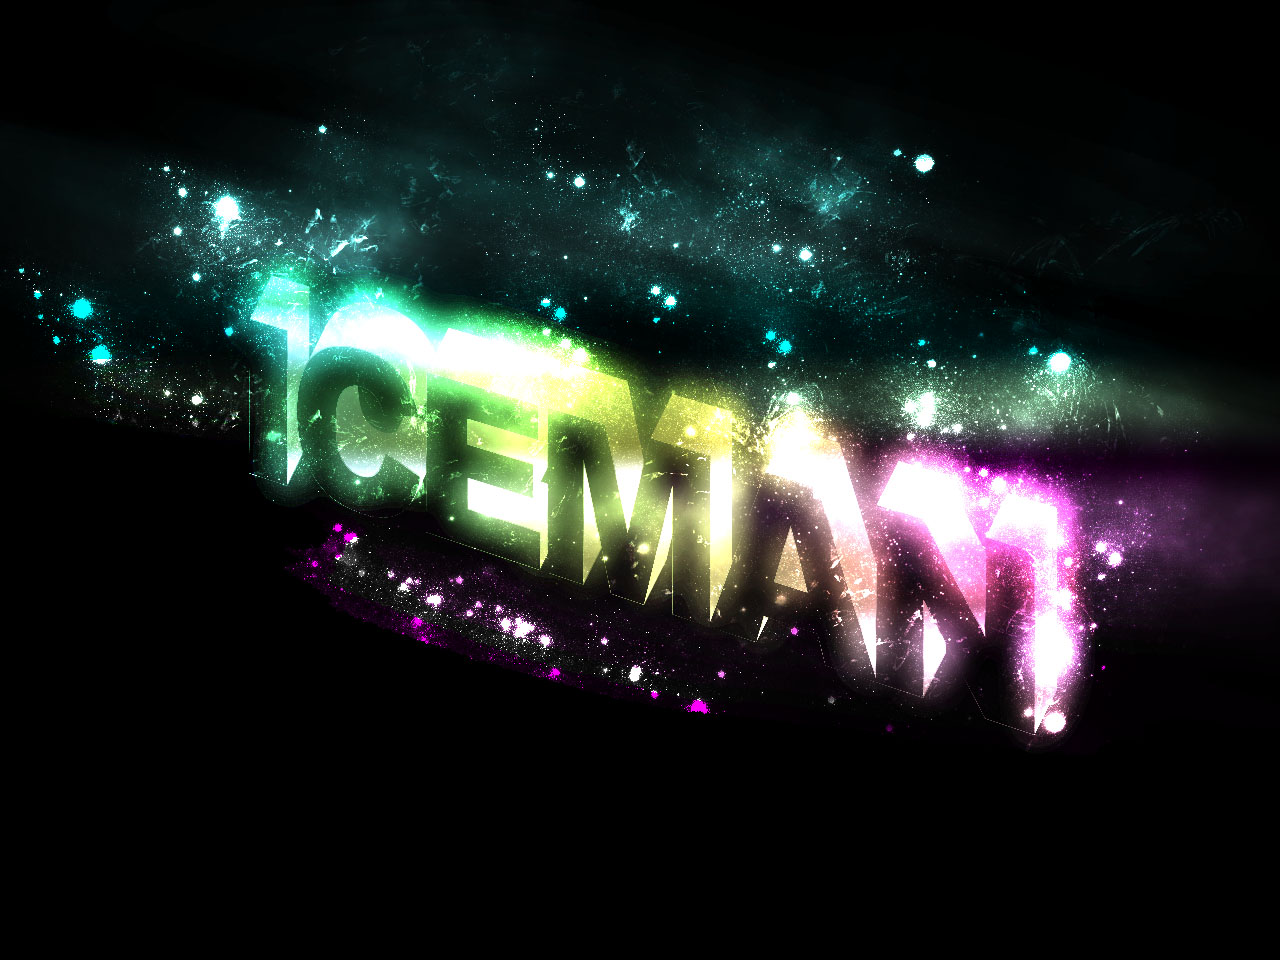 Click to see it in full view
Step 1:
Open your adobe photoshop with the large canvas, fill it with black background.
Step 2:
Make a nice 3D text effect that we study last week if you miss it just click here. Or just used a 3D tool software.
 Step 3:
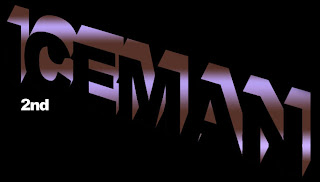
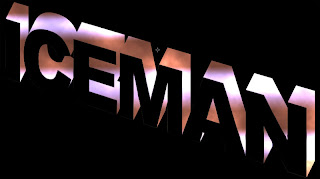
Just don't forget to rasterize the 3d text effect(right click the layer->rasterize) that you have made. Then, with the Magic Wand Tool select the face of the letters and cut that part.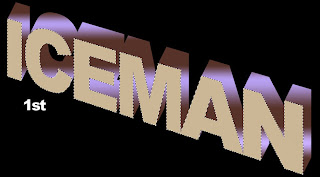
 Step 4:
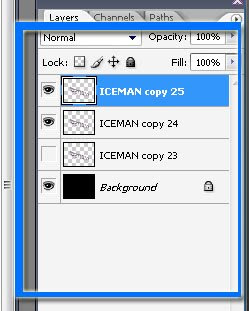
Make two copies of the layer(right click the layer->duplicate layer), and just hide the original layer or the last 3d text layer as shown in the screen shot below.
 Step 5:
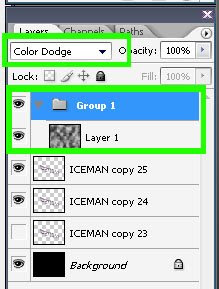
Next, create a new layer group(Just look for the folder icon in the bottom of the layer pallet), change the blending mode of this group to Color Dodge�. Create a new layer(shift+ctrl+alt+n or go to layer->New->layer) inside the group, And with the new layer Apply Filter -> Render -> Clouds. See screen shot below.
 Step 6:
 Step 7:
Repeat step 6 with two other bright colors, but you must placed it differently. To give more great effects.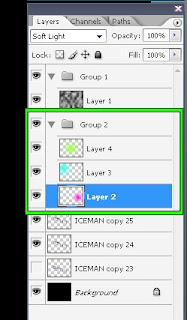 This is the result after making the 3 layer and changing the blending mode to the soft light
 Step 8:
Fot this step select the 3d text that you hide in step 4 unhide it. Then apply a Gaussian Blur of 15 pixel radius (Filter -> Blur -> Gaussian Blur) or higher just adjust it until you are satisfied.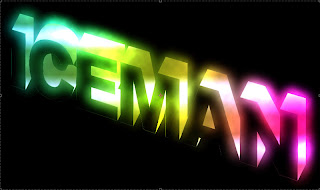 Step 9:
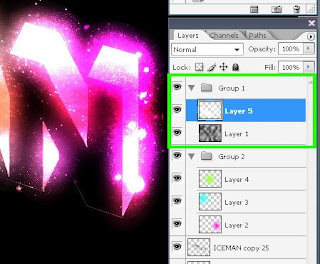
Add a new layer in the first group that we created above the render clouds and on this layer choose a nice brush(I'm using a star brushset)you can download it at www.qbrushes.com. the name is rabies star brush and use white to trace around the inside face of each letters.

Step 10: Make a new layer between the two groups(put the new layer in the middle of the two groups). Then use Gradient Tool (Linear Mode), choose White(use foreground to transparent presets of the gradient), drag the Gradient tool from the bottom edges of the canvas to the middle of the canvas. Set the blending mode to Saturation.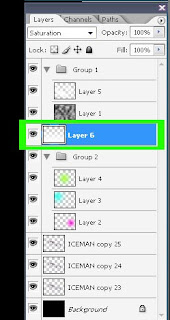
 Step 11: Create another layer and put it in the first group or in the group 1�.
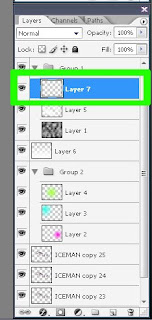 Step 12: Then use custom brush tool brush just like what we did in Step 8 (remember, use WHITE).
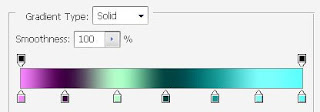
 Step 13: Then for the last step. Create another layer on the top of the layer that we created in step10 then use a nice large custom cloud brush, and draw a single cloud above the text. Then Apply a Motion Blur (Filter -> Blur -> Motion Blur) with an Angle of of -15. and a distance of 250 pixels(or just experiment it until you are satisfied). Then Change the Opacity to 30%� and apply a gradient overlay with the following settings:
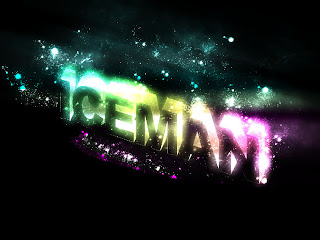
 And the final result.....

Open your adobe photoshop with the large canvas, fill it with black background.
Step 2:
Make a nice 3D text effect that we study last week if you miss it just click here. Or just used a 3D tool software.
 Step 3:
Just don't forget to rasterize the 3d text effect(right click the layer->rasterize) that you have made. Then, with the Magic Wand Tool select the face of the letters and cut that part.

 Step 4:
Make two copies of the layer(right click the layer->duplicate layer), and just hide the original layer or the last 3d text layer as shown in the screen shot below.
 Step 5:
Next, create a new layer group(Just look for the folder icon in the bottom of the layer pallet), change the blending mode of this group to Color Dodge�. Create a new layer(shift+ctrl+alt+n or go to layer->New->layer) inside the group, And with the new layer Apply Filter -> Render -> Clouds. See screen shot below.

 Step 6:
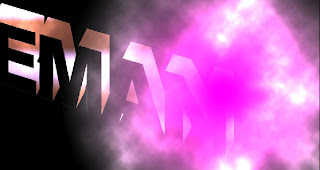
Create another group(Just look for the folder icon in the bottom of the layer pallet) below the first group that we created, Create a new layer inside this group add a nice light color with the use of gradient tool (in Radial Mode) use foreground to transparent presets of the gradient tool and draw a soft edge glow. Then set the layer blending mode to the Soft Light�.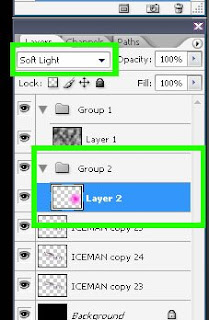 You are now able to see a nice effect.
 You are now able to see a nice effect.
 Step 7:
Repeat step 6 with two other bright colors, but you must placed it differently. To give more great effects.
 This is the result after making the 3 layer and changing the blending mode to the soft light
 Step 8:
Fot this step select the 3d text that you hide in step 4 unhide it. Then apply a Gaussian Blur of 15 pixel radius (Filter -> Blur -> Gaussian Blur) or higher just adjust it until you are satisfied.
 Step 9:
Add a new layer in the first group that we created above the render clouds and on this layer choose a nice brush(I'm using a star brushset)you can download it at www.qbrushes.com. the name is rabies star brush and use white to trace around the inside face of each letters.


Step 10: Make a new layer between the two groups(put the new layer in the middle of the two groups). Then use Gradient Tool (Linear Mode), choose White(use foreground to transparent presets of the gradient), drag the Gradient tool from the bottom edges of the canvas to the middle of the canvas. Set the blending mode to Saturation.

 Step 11: Create another layer and put it in the first group or in the group 1�.
 Step 12: Then use custom brush tool brush just like what we did in Step 8 (remember, use WHITE).
 Step 13: Then for the last step. Create another layer on the top of the layer that we created in step10 then use a nice large custom cloud brush, and draw a single cloud above the text. Then Apply a Motion Blur (Filter -> Blur -> Motion Blur) with an Angle of of -15. and a distance of 250 pixels(or just experiment it until you are satisfied). Then Change the Opacity to 30%� and apply a gradient overlay with the following settings:
 And the final result.....


